Why a post about Snowflake? What does Alteryx and Tableau have to do with Snowflake?
Here is some context: as I was planning to launch my Data Lake consulting business, which is now launched, I was looking for a place to store and share prototypes, which need to be queried from Tableau with high performance. Cloud databases offer the flexibility in terms of capacity, performance, pricing and portability that I was looking for.
The leaders in that field, AWS and Azure, offer a lot of solutions, but I decided to take a closer look at Snowflake, not only because it is a hot startup, but also because it promises Uncompromising simplicity, read: no need for a DB Admin! I consider that feature a huge advantage over Redshift, which takes quite some technical skills to get even started…
My experience testing the platform proved that that specific promise of easy administration is met, even though that simplicity does not extend to the overall experience. To put it another way, Snowflake is not Citizen Analyst ready yet, but with a bit of tweaking, and the research I will share below, it comes pretty close!
To illustrate the step by step process, I will use the business scenario of a previous post: storing 27k rows of review data for a Word Cloud analysis.
Setting Up your Snowflake Instance
- Snowflake offers a free trial with some sizable credits to start playing:
https://sfc-bzops-1.snowflake.net/
It took me 5 days to get my instance approved, so you might want to include that time into your plans, spontaneity here is quite limited… - Once your instance is created, you get to create your first warehouse:
 I strongly suggest to stick with the X-Small Size instance for as long as possible to save your credits. In my experience so far, it is surprisingly powerful and ended up meeting my needs for quite large queries against 20+ million large records…
 - Then proceed to create your database:

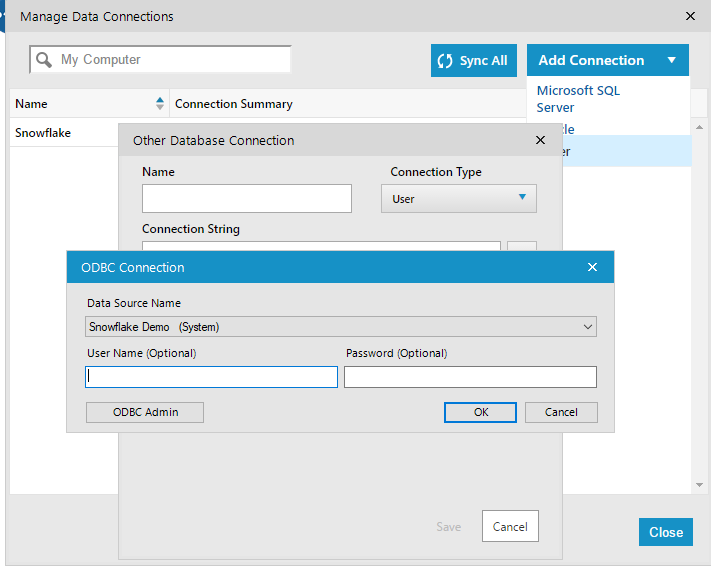
- Next step is to create the database table you want to load into Snowflake. Alteryx comes very handy for that task, to save you a lot of manual SQL labor. But first, you will need to connect Alteryx to Snowflake by declaring an ODBC connection. After downloading the ODBC driver from here and installing it, open Alteryx and go to Options/Advanced Options/ Manage Connections and Add Other/ODBC:

- Then Click on ODBC Admin:

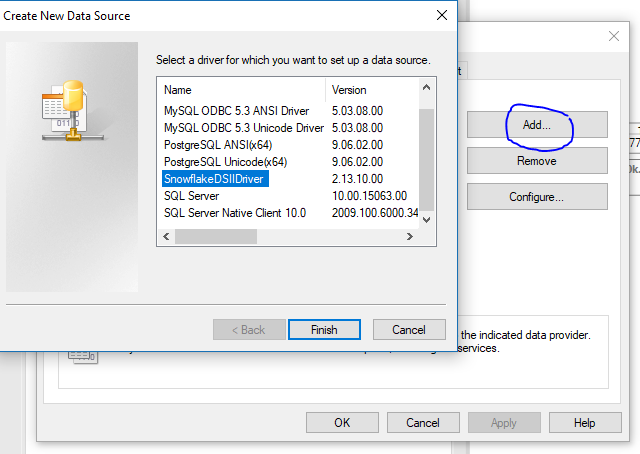
- Click Add to create a new Data Source,and pick the Snowflake driver you just installed
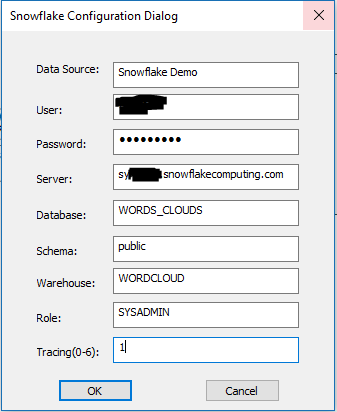
- Populate the entries:
- Snowflake should now appear under System DSN

- And you should be good to go in Alteryx too:
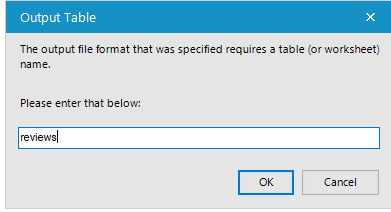
- Last Step is to enter the name of the Table you want to create in the Output tool when you pick a connection:
Create an Alteryx workflow to load your data the Quick & Dirty way
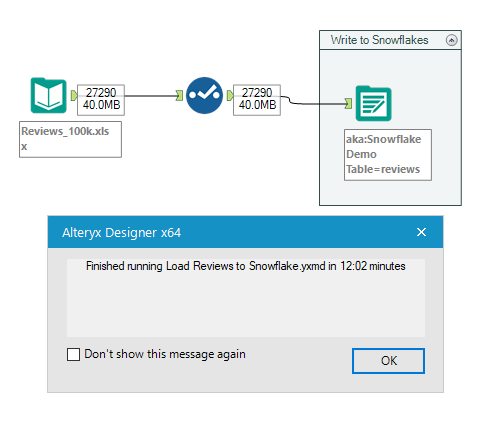
It gets pretty easy in Alteryx, just take your flat file or any other source, drag the output tool and set it to the Snowflake connection, and kick it off!
No SQL or other code required! If you want to optimize your size and performance, it would be good to insert the Auto Field tool, as described in that earlier post.
One thing you will notice though, is that it took 12 minutes to load 27k records, which is really long. This is because through ODBC, Snowflake inserts each row, one at a time. Tedious… There has to be a better way…
Load Swiftly Data in Bulk to Redshift with Alteryx
The slow insertion issue is not happening when using Alteryx for bulk loads to SQL Server or Redshift for instance, because the Alteryx connector offers a Bulk loader code built in. That bulk loader is effectively copying a compressed CSV to an intermediary stage, AWS S3 in the case of Redshift, and then inserts into the DB from S3, which it turns out, is a much more efficient process. This approach is also advocated by Snowflake, as per this useful video:
Since Snowflake is hosted by AWS, it is using currently S3 for its “Internal” storage, and therefore, you don’t need an external S3 account to follow that process, as it is included in your Snowflake account. You can also use your existing S3 account, but for this guide, I will assume you stay within Snowflake.
The bad news is that, whereas the process is transparent when using Redshift or SQL Server, it gets much more involved with Snowflake at the moment. Eventually, Alteryx will offer a more streamlined experience, and I heard it is planned, but today the bulk loading to Snowflake feature is not included in Alteryx. [2019 Update: Alteryx now offers a Bulk upload connector to Snowflake, BUT it requires credentials to a S3 bucket, and does not make any use of the Snowflake internal staging resource, which comes free with a Snowflake account. The S3 settings on the connector are also REALLY hard to configure. That Bulk connector released by Alteryx is a deeply flawed approach in my opinion, since the purpose of using Snowflake for most analyst users is to get rid of Redshift, which is hard to manage. And therefore they do NOT want to manage and pay for a S3 bucket! So the approach through SnowSQL I describe in this post remains relevant I’m afraid…].
Furthermore, more crucially, Snowflake does not yet support the PUT command through ODBC, which is a key step of the process as we will see [2020 Update: they now do on AWS hosted Snowflake version]. The good news is that we have here a great opportunity to understand what goes on under the hood when bulk loading, and this step by step guide will reveal it all!
1. Modify your Alteryx workflow to only create the table
We will use the actual data to create a table without having to type all the column definitions, restricted to 10 rows to not have to wait, using the Sample tool:
 Make sure you also input the following command into the Snowflake Output tool:
DELETE FROM “WORDS_CLOUDS”.”PUBLIC”.”reviews”;
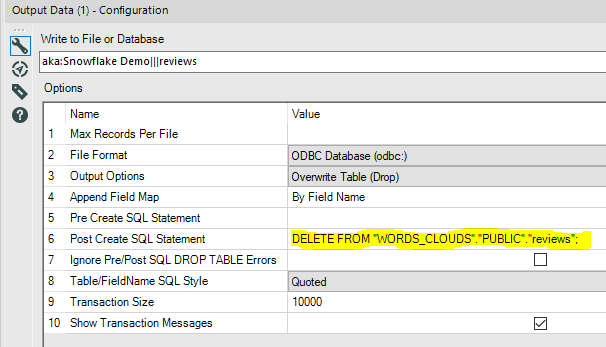 This will remove those 10 rows we just loaded through ODBC, while keeping the table ready to be loaded in Bulk.
2. Install SNOWSQL
SnowSQL is the command line tool for Snowflake, the equivalent of TABCMD for the Tableau folks. It is NOT sexy but it becomes a required install as it does not have the limitations of the ODBC connection.
- Download the install files from here:
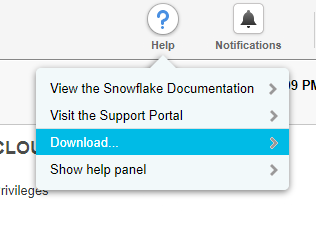
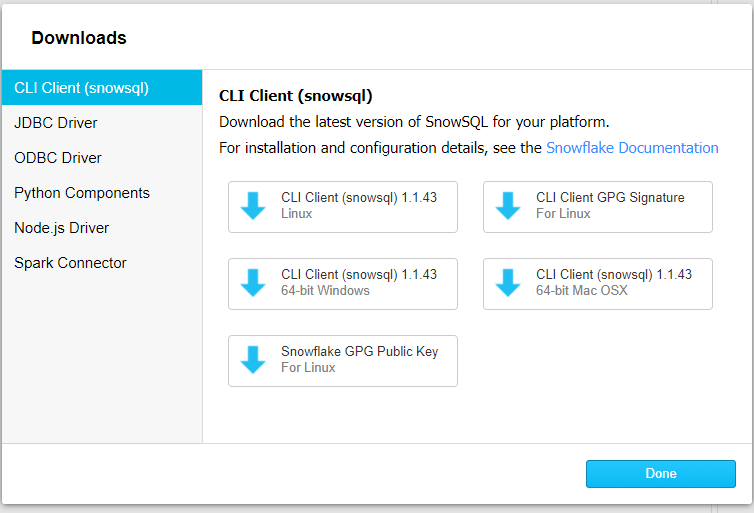
- After installing the App, find the Config file in the snowsql folder and go edit it to input your credentials:
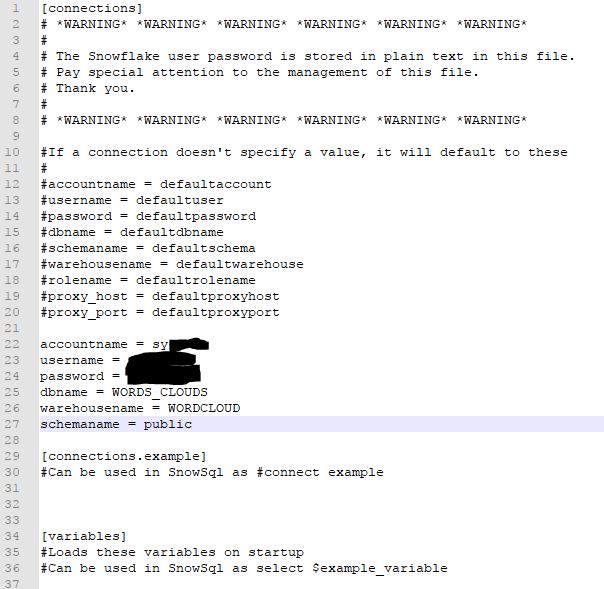
make sure you input those lines above the [connections.example], save and close it… - Open your Command line editor (in Windows type CMD in Start) and then input the command snowsql. You should see this:
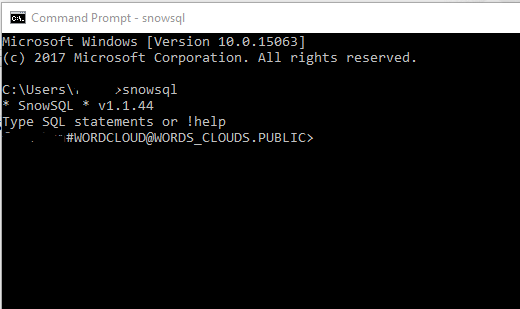
3. Stage the files to the cloud
Here, we use the internal storage offered by Snowflake to stage efficiently the files from your end to the cloud using the PUT command
- Convert your data into a CSV file, then compress it to a GZIP format, using the Open Source 7-Zip tool available for all systems.
- Create a STAGE in Snowflake:
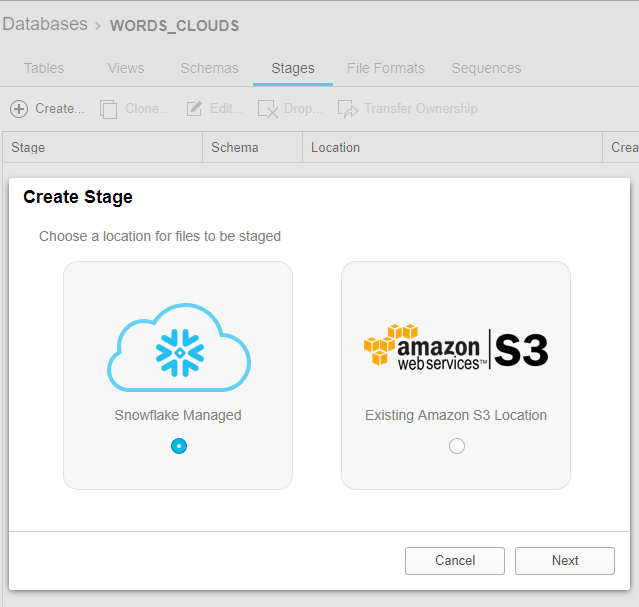
I called it REVIEWS_STAGE, and no settings are needed… - Use your SNOWSQL command line to input PUT command which will upload to the Stage, Internal table in that case, of Snowflake:
 As you can see, it took only 12 seconds, not minutes! I tested loading 20 million records, quite large columns, and it took only minutes, with the smallest instance!
4. Load from the cloud file to your Table
- Create a simple File format to indicate to Snowflake the incoming format of your CSV:
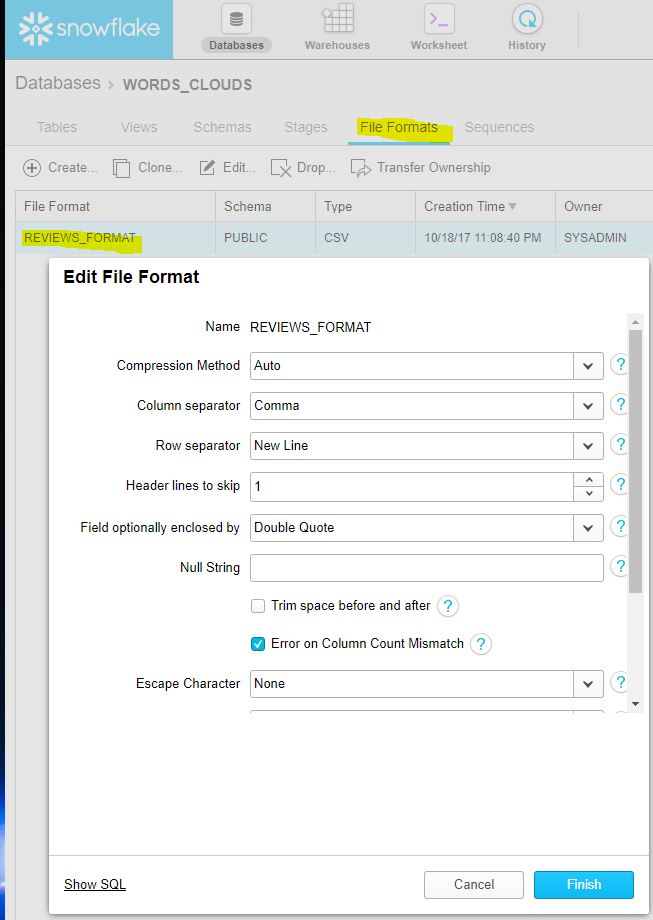
- Run the Copy Into command from SNOWSQL, which will write the CSV to your table:
 and this time it took only 3 seconds… Snowflake handles the GZIP format transparently…
 - go check your newly loaded table:
 with the expected 27k records…
5. Query your new Table from Tableau
Create your connection to Snowflake in Tableau:
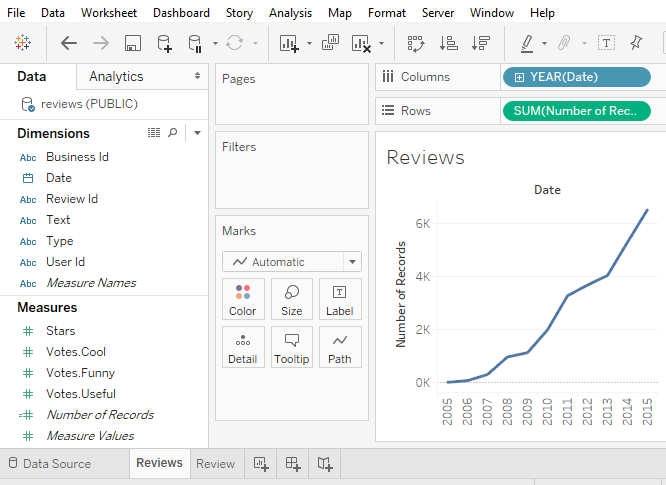
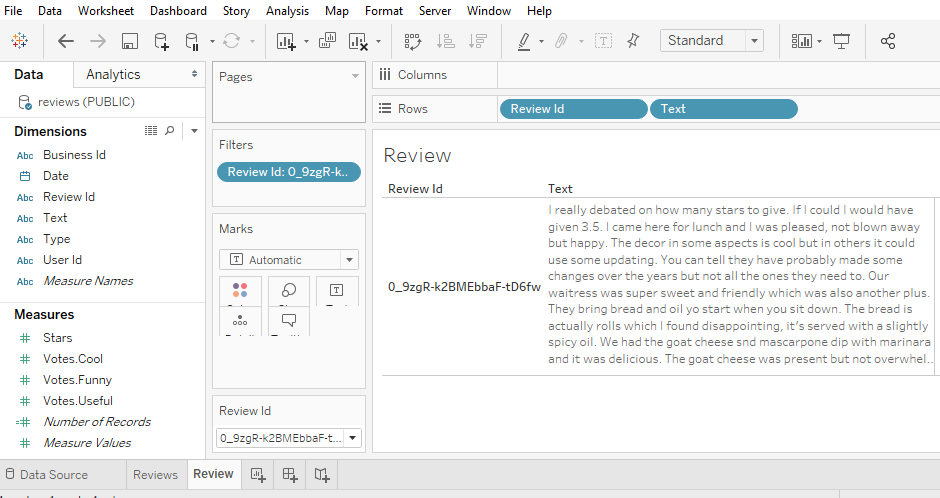
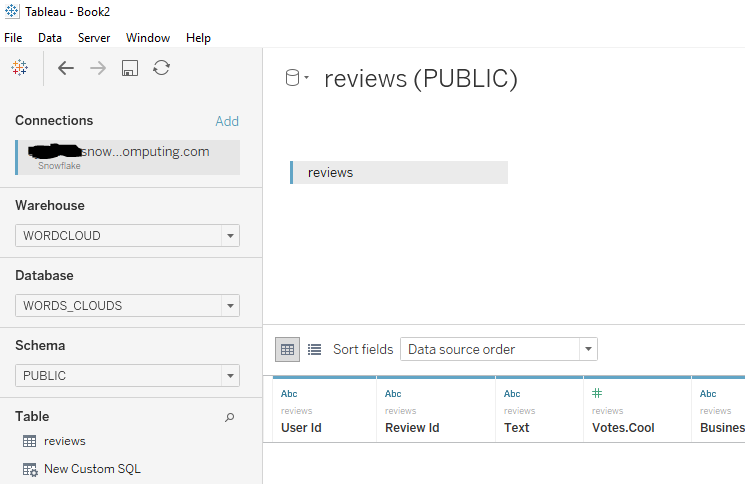 and now, with minimal code, you get to query away!

How many internal stages in Snowflake can you create?
Up to one per table…
Hi ,
I trust you are well ,
I am using both trail versions of alteryx and snow when trying to load data to snowflake I am getting the following error :
Error: Output Data (6): Error SQLDriverConnect: [Snowflake][ODBC] (11570) Required credential settings are missing: {[PWD]}. [Snowflake][ODBC] (10380) Unable to establish a connection with data source. Missing settings: {[PWD]}
I have configured the connected as you have described .
You are missing a step here, as the ODBC credentials are not flowing through as they should.
Make sure your ODBC credentials are properly set in Windows, and that the Data source is well setup in Alteryx using those ODBC credentials…
This is a great post! I just wanted to say thanks.
Useful post! FYI: Snowflake updated the Snowflake ODBC driver (version 2.17.5 and higher) to support the PUT and GET commands.
Very useful indeed! Thanks for sharing!
Frederic, If PUT is supported in Snowflake ODBC 2.17 and later, where exactly the PUT needs to be coded? In the Pre Create SQL statement?
Thanks
That is a good question: You should be able to add the PUT command directly to the Alteryx output tool without needing to open SnowSQL anymore… I need to look into it and test to make sure it works. Note that for now that feature is only available if your Snowflake is hosted on AWS. No Azure yet…
Hi, have you been able to make this work in Alteryx yet? Currently testing Snowflake and immediately hit the ODBC 1 row at a time issue so not seeing any performance benefits and I don’t and won’t have an S3 bucket…
Can i use “snowsql -c example” (Named connection) so that i can automate this process on alteryx gallery also.
Good question, worth testing, but I don’t have an Alteryx Gallery, alas…
Pingback: How to filter transactions by a calculated category using SQL Window Functions | Insights Through Data