
Have you noticed that ominous warning every time you connect to Google Analytics (abbreviated to GA for the remainder of this post)?

Yes, the Google Analytics you have used and loved (mostly because it’s free, admit it…) is about to get a major upgrade starting July 2023. Some sites have already switched to the new version, which is fully rebuilt, all the way to the API. This means that all existing connectors need to be rebuilt as well, and not everybody is ready… Alteryx offers a standard connector to the current GA, called UA for Universal Analytics. Yet, no Alteryx GA4 connector set to be available before spring 2023 at best. You are pretty much on your own if you need to import GA4 transactions earlier…
Well that’s a great opportunity to build a quick & dirty custom API connector, understand the process and access all the levers offered by the enhanced API… You can gain a lot of time by downloading the workflows from the bottom of this post, but be aware that the solution is way less polished than what Alteryx will subsequently release. It will do the job in the meantime.
To get acquainted with the changes GA4 brings over UA, Google offers a great resource here:
https://ga-dev-tools.web.app/query-explorer/
which lets you switch between UA and GA4 with an actual switch:

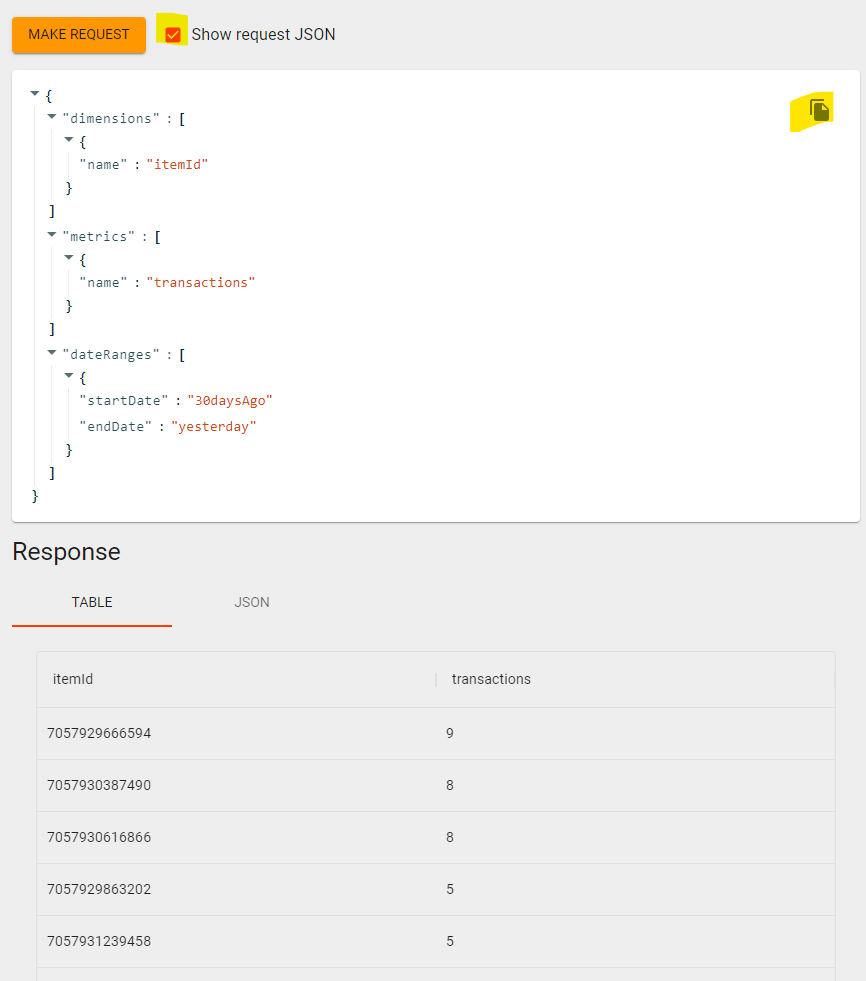
You can observe that in GA4, the query commands (dimensions and metrics) in the API call are not found in the parameters anymore, but instead within a JSON array in the body payload. You will note, as well, that the naming of metrics and dimensions has evolved…
What do I need to query the GA4 API?
There are really 3 key elements you will need, to assemble to query the GA4 API in Alteryx and retrieve data sets. The good news is that 2 of them are really easy to get! Here they are, ranked by growing level of difficulty:
- Property ID for the URL
- Query Commands (Payload)
- Authentication
Property ID
At the top of your GA4 Query explorer, once you are logged in with the relevant Google Identity with access to the GA instance, pick Query Explorer and then Select Property:
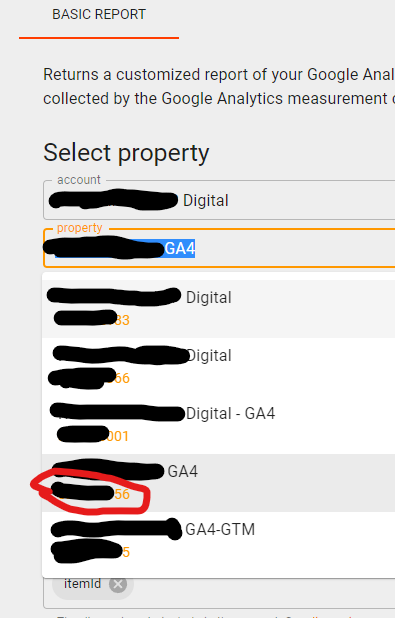
The orange digits circled are the property ID you want to query. All you need to do is insert those digits in the following URL instead of the YOUR_PROPERTY_ID_HERE string:
https://analyticsdata.googleapis.com/v1beta/properties/YOUR_PROPERTY_ID_HERE:runReportQuery Commands / Payload
Here as well, your GA4 Query explorer makes it very easy once you are logged in with the proper credentials. Once you configure the dimensions and metrics you need, you can check show request JSON before pressing MAKE REQUEST, and upon obtaining the expected result, using the Copy button at the top right to get a properly formatted JSON payload ready to paste into a formula in an Alteryx formula. Easy-peasy:
Authentication
Now comes the real challenge! And if you need to authenticate in Alteryx, which is the CURL approach really wrapped into the Download tool, I’m afraid the quick start in Google documentation is completely useless… To be fair, that documentation is good for the list of metrics and dimensions… Let’s get started without it…
Let’s enable your GA4 instance to serve API requests:
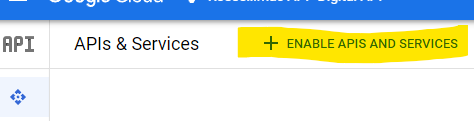
- Go to https://console.cloud.google.com/apis/dashboard and select relevant Project or create one if you need
- Click on Enable APIs:
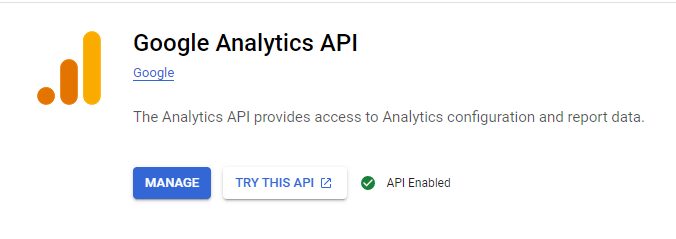
and select Google Analytics API
Now you need to be aware that there are 2 distinct types of authentication you can obtain to use in Alteryx, for roughly the same level of effort:
- OAuth 2.0 for Web Server Applications:
This is the most common approach advocated by Alteryx, which is tied to your Google Identity credentials. It works, but the tokens don’t last that long, depending on many config factors too long to explain here and requires too much manipulation for my taste. It also will not work on a Alteryx Server since a user needs to approve the use of her credentials when the workflow runs… - OAuth 2.0 for Server to Server Applications:
It is really an approach meant for a service account that I strongly recommend if you have enough access in your Google Account. It will work without maintenance past the initial setup, and can be transferred to other users and/or run from a Server.
You can read the documentation about those respective approaches I linked above, to decide, but I will cover both anyways, and you can therefore skip the documentation…
Web Authentication using Google Playground
- Go to Credentials and click on Create:
Select Oauth Client ID and Web Application for Application Type, give it a name and then Click on ADD URI Button and input https://developers.google.com/oauthplayground then SAVE. Copy and store the Client ID as well as the Client Secret - Go to OAuth consent screen and Select External, then fill out the required fields, next page add ./auth/analytics.provision, save and send to Production
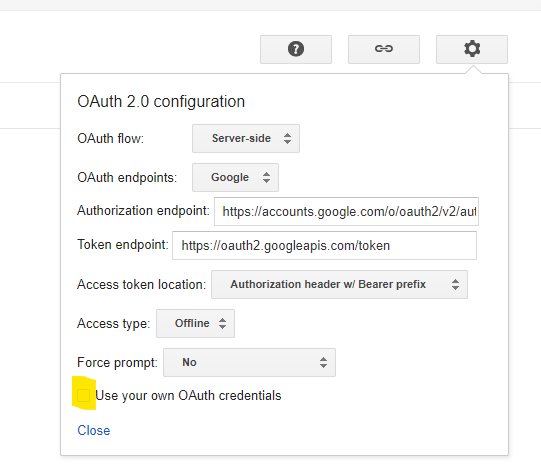
- Go to https://developers.google.com/oauthplayground/ and check the Use your own OAuth credentials box:
Input your Client ID and Client Secret and close.

On the left hand side, select the scopes highlighted below for GA (the readonly row can suffice):
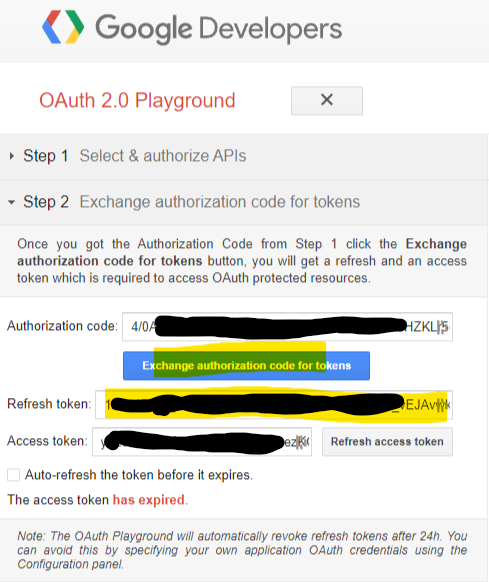
Then authorize API, followed by Exchange authorization code for tokens, and you will get your Refresh Token:

At that point, you can now open my GA Web Download workflow, which you can download at the bottom of this post, and input your Property ID (blue circle), the JSON Payload (green circle):
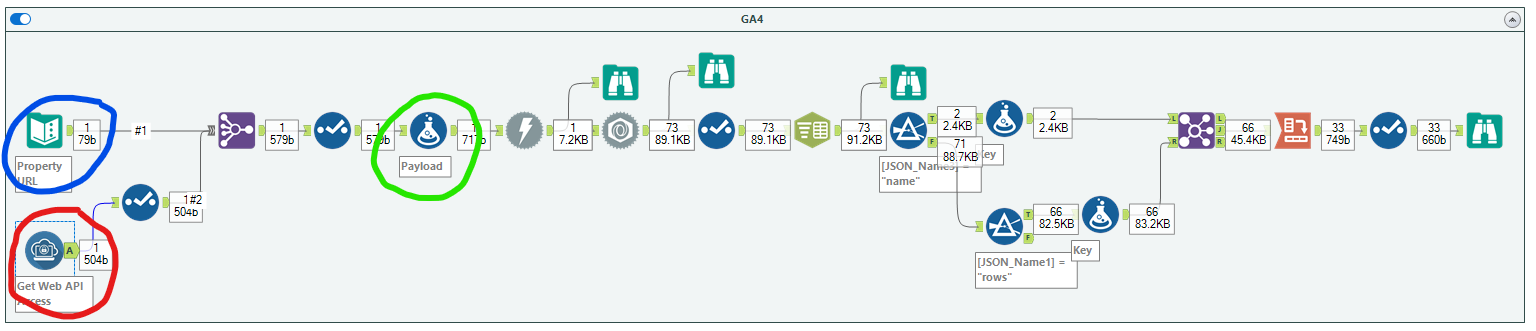
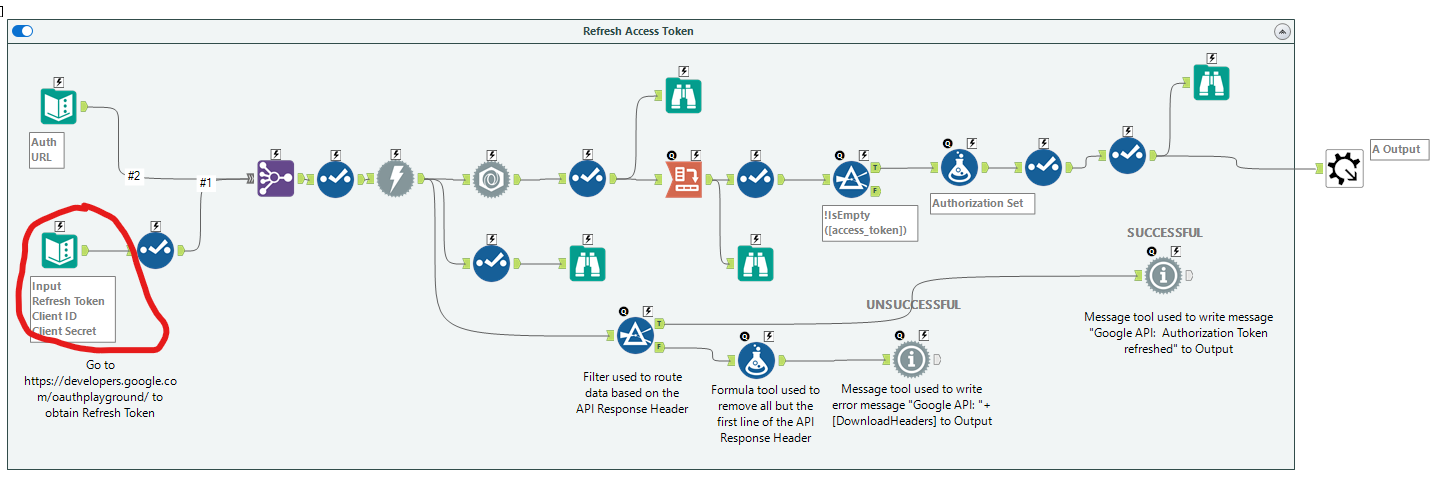
Then right click on the Authentication macro (red circle) to open it and input the Refresh Token (NOT Access), as well as Client ID and Client Secret you already collected:
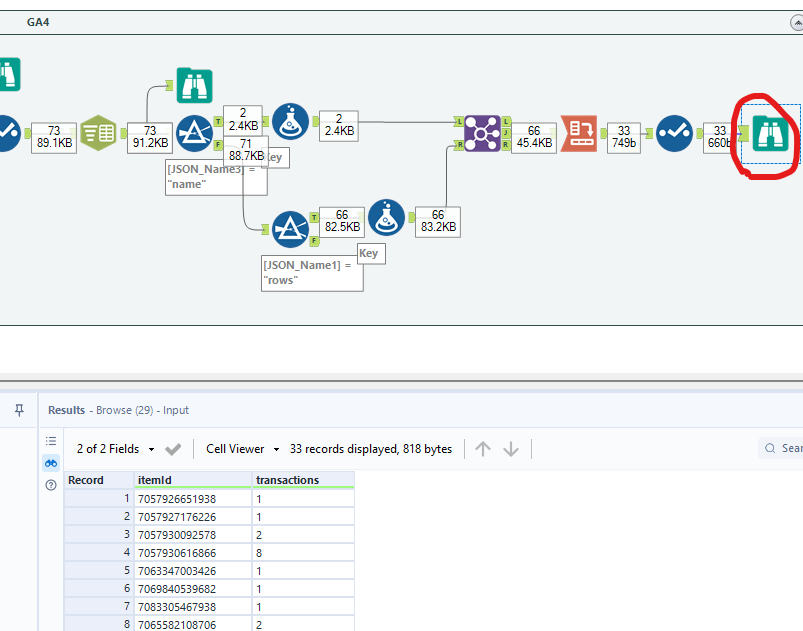
You should be good to go with that web approach and the result is just like the GA4 Explorer:
Authentication using a Service Account
- Create Service account:
- Go to:https://console.developers.google.com/iam-admin/serviceaccounts
Ensure you are using the google ID that has access to the GA instance, not your personal one and pick the project… - Follow those instructions: https://developers.google.com/identity/protocols/oauth2/service-account#creatinganaccount
- You can stop following the instructions when you have the following:
- email address of the service account (example: alteryx-api@app-digital-api.iam.gserviceaccount.com)
- A JSON file downloaded with all the keys, to be saved carefully
- Go to:https://console.developers.google.com/iam-admin/serviceaccounts
- Add service account email to GA Property:
- Go to GA homepage: https://analytics.google.com/analytics/web/provision/#/provision
- Select relevant property, checking the ID
- Go to Admin / Property Access Management:
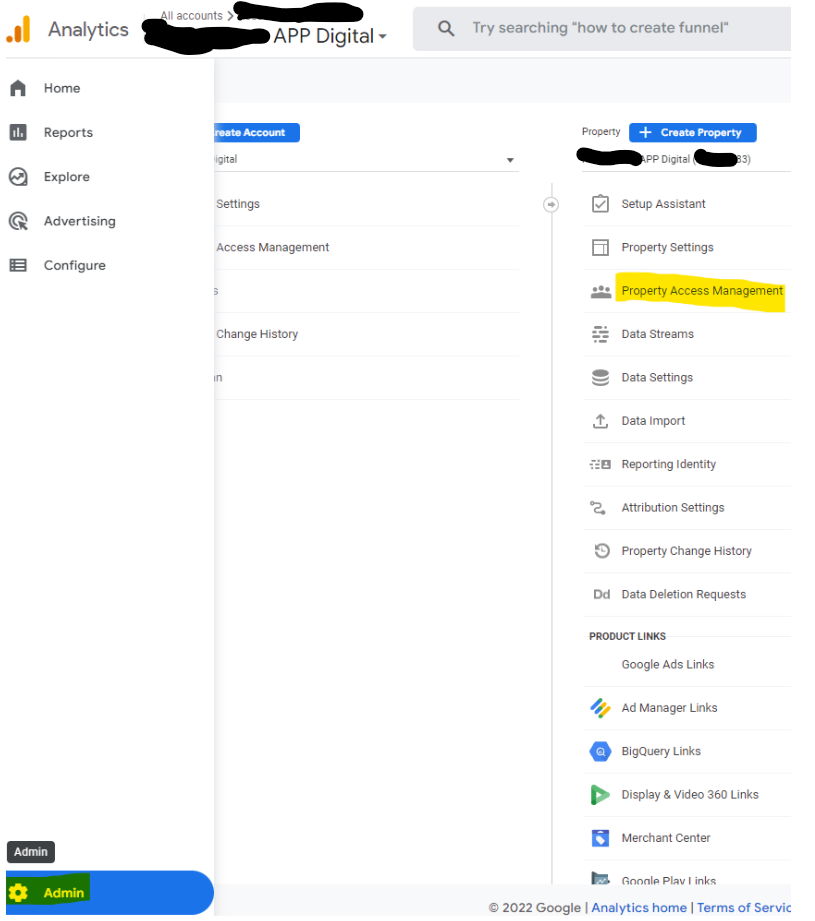
Add the Service Account email with a Viewer role.
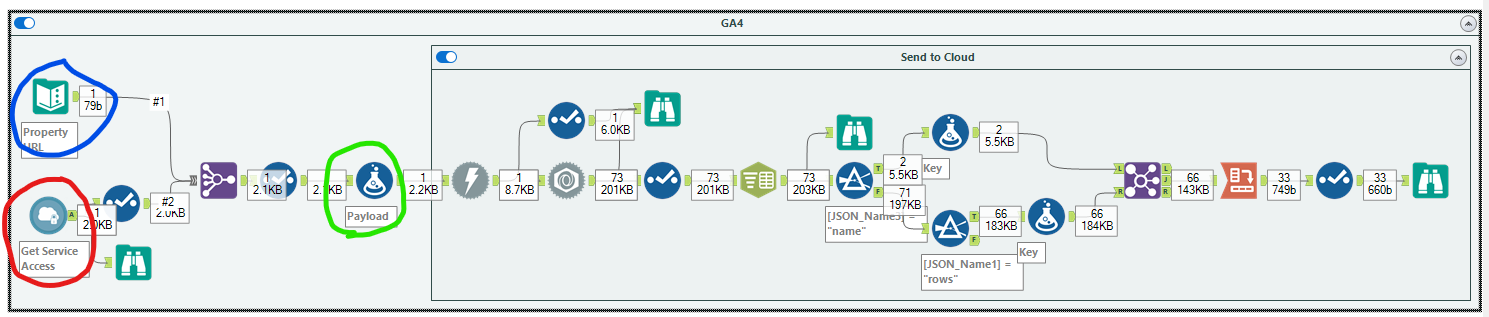
Now you can open my GA Download Server workflow, which you can download at the bottom of this post, and input your Property ID (blue circle), the JSON Payload (green circle). Next, can open the Macro Get GA Service Account Access Token.yxmc (red circle) and edit the Python Script to replace the full path (highlighted green below) to the JSON key file you downloaded for your Service Account:
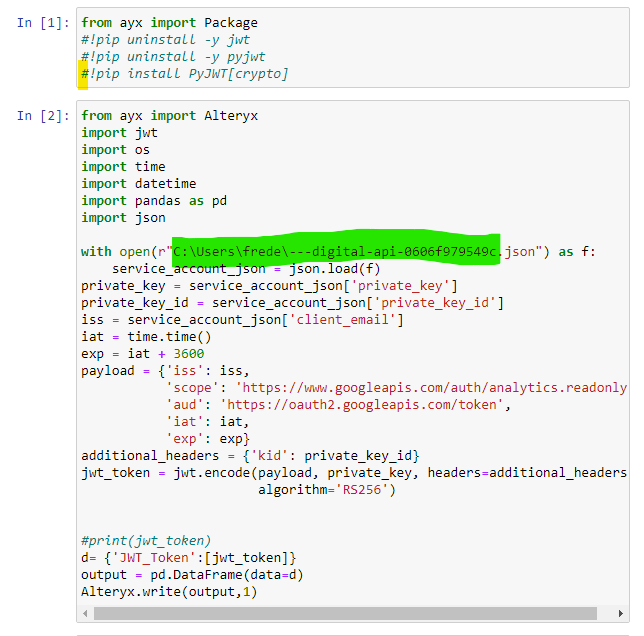
The main Python library used here is PyJWT documented here. Before you run the workflow, make sure your remove the character highlighted in yellow above, and run that first cell once, to install the required library on your machine. It can be commented again once it’s done. Here is the JSON script ready to be copied:
from ayx import Alteryx
import jwt
import os
import time
import datetime
import pandas as pd
import json

with open(r"C:\Users\frede\------.json") as f:
    service_account_json = json.load(f)
private_key = service_account_json['private_key']
private_key_id = service_account_json['private_key_id']
iss = service_account_json['client_email']
iat = time.time()
exp = iat + 3600
payload = {'iss': iss,
           'scope': 'https://www.googleapis.com/auth/analytics.readonly',
           'aud': 'https://oauth2.googleapis.com/token',
           'iat': iat,
           'exp': exp}
additional_headers = {'kid': private_key_id}
jwt_token = jwt.encode(payload, private_key, headers=additional_headers,
                       algorithm='RS256')


#print(jwt_token)
d= {'JWT_Token':[jwt_token]}
output = pd.DataFrame(data=d)
Alteryx.write(output,1)
It should work now every time you run the main workflow without having to worry about the Refresh Token expiring, as long as you have the JSON file on the machine…
Download Workflows HERE.